

Roof bars to roof box: complete 2026 fitting workflow
Instead of repacking the boot before every camping trip, fit your roof box to compatible roof bars, secure the approved mounts, and strap the luggage inside. This guide explains how to fit a roof box to roof bars, check the roof-load limit, and complete the clearance checks before driving in Ireland.
- We recommend approved roof-box mounts for camping trips in Ireland; improvised fixings are not a substitute.
- Learning how to fit a roof box to roof bars starts with vehicle, bar and mounting compatibility.
- Roof-load calculations must include the bars, fitting kit, empty roof box and luggage.
- Check tailgate clearance, secure luggage internally, and measure the car’s fitted height before departure.
For your 2026 camping setup, choose compatibility before capacity. Our roof boxes for camping trips in Ireland guide covers the buying decision; the workflow below covers fitting and checking the equipment you have.
Why this matters
A roof box transfers its load through the mounting hardware, crossbars and vehicle attachment points. Each part needs to be compatible with the next. A large box does not increase the car’s permitted roof load.
The best fitting method is the one approved for your exact box, bars and vehicle. A clamp that appears to close is not proof of compatibility. Bar shape, dimensions, mounting position and underside clearance all matter.
For trips around Ireland, include campsite entrances, ferry decks and car-park barriers in your planning. The fitted box changes your vehicle’s height, while the extra roof load changes how the car responds to braking and bends.
Before you start
- Have the correct instructions and equipment. Get the vehicle handbook, roof-bar fitting guide and roof-box manual for your exact models. Have the complete approved mounting kit, keys, internal luggage straps, a measuring tape and any specified tools ready.
- Confirm every load limit. Identify the vehicle’s permitted roof load while driving, the bar-system limit and the box’s luggage limit. Find the weights of the bars, fitting kit and empty box before deciding what luggage to add.
- Check the hidden clearance problem. A mount can fit around a bar yet foul the vehicle roof underneath. Confirm bar dimensions, permitted spacing, clamp clearance and tailgate clearance before lifting the box into place. Stop if the instructions do not confirm compatibility.
Use sound, undamaged equipment. Missing plates, cracked clamps, damaged threads or an unidentified fitting kit are reasons to pause, not reasons to improvise.
Vehicle and roof-bar setup
- Park on firm, level ground away from traffic. Apply the parking brake and leave enough room to work along both sides of the vehicle. Avoid fitting an empty box in strong wind.
- Identify the vehicle’s approved attachment system. Raised rails, flush rails, fixed points and bare roofs require their own compatible feet and fitting kits. Longitudinal roof rails alone are not a substitute for approved crossbars.
- Inspect the bars, feet and vehicle contact points. Remove dirt from the contact surfaces. Replace damaged parts rather than covering them with padding or tightening around the damage.
- Fit the bars in the positions specified by the vehicle and bar-system instructions. Measure spacing using the reference points those instructions give. Do not move a bar outside its approved position just to reach a roof-box mounting slot.
- Tighten the bar-system fasteners in the specified sequence and to the stated setting. Use the supplied torque tool or a suitable torque wrench where required. Fit the covers and locks as instructed.
Expected result: the crossbars are correctly positioned and secured, with no loose feet or fittings. Their spacing falls within the roof box’s approved mounting range.
Write the confirmed bar positions into your 2026 trip checklist. That saves repeat measuring, but it does not replace checking the bars whenever you refit them.
Roof-box position
- Empty the roof box before lifting it. Arrange help if you cannot lift and position it safely without reaching across the car or dragging it over the paintwork.
- Place the box in the travel direction shown in its manual. Align its mounting tracks or slots with the crossbars. Keep protective packaging away from the final contact surfaces.
- Position the box laterally within the permitted mounting area. Centre it unless the instructions allow an offset position. Make sure you can reach the opening side safely without standing on tyres or unstable objects.
- Adjust the box forwards or backwards within its approved range. Open the tailgate slowly while watching the box, spoiler and aerial. Stop before anything touches; do not force the tailgate against the box.
- Check the mounting locations from inside the box and beneath the bars. Each fitting must sit where the manual permits, clear of roof-bar feet and other obstructions. Check any sunroof restrictions in the vehicle and bar instructions.
Expected result: the box rests in an approved position, its mounting points align with both bars, and the tailgate opens without contact.
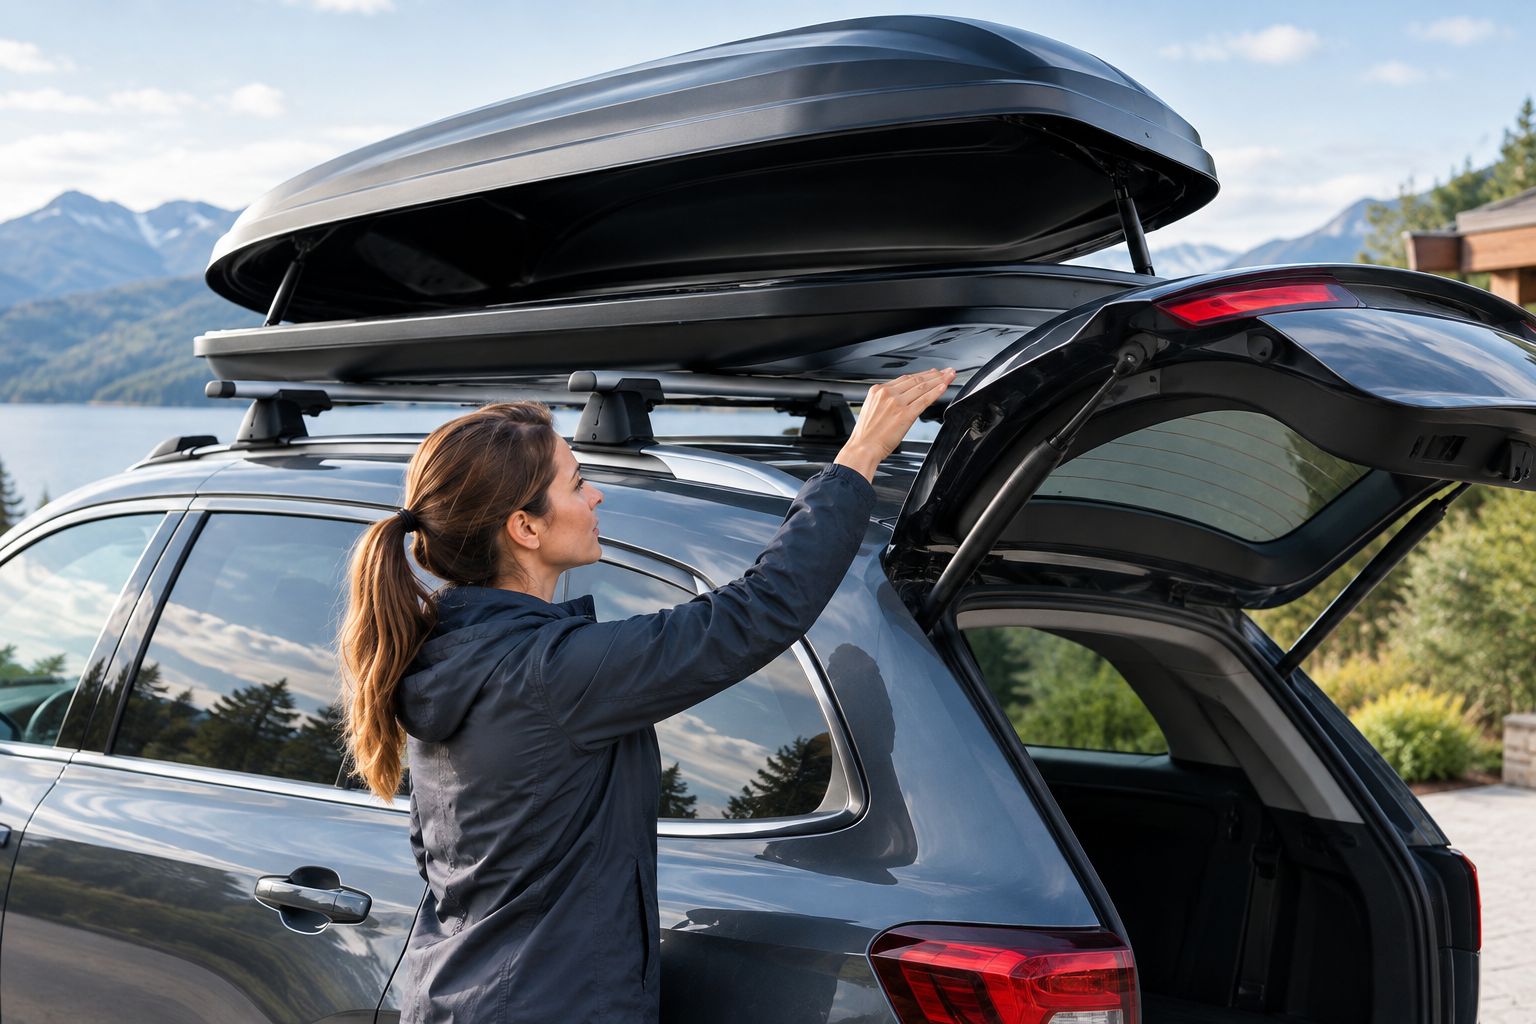
Check opening access as well as tailgate clearance. A box positioned for easy loading at home must still be usable when parked safely at your destination.
Mounting hardware
Roof-box fixings differ. Identify the system supplied with your box before starting; do not mix instructions from another model.
| Mounting system | Best for | Practical benefit | Limitation to check |
|---|---|---|---|
| Wraparound clamps | Compatible bars within the clamp’s approved dimensions | Tighten around the crossbar without using its accessory channel | Jaw opening, bar shape and underside clearance must match |
| U-bolt fittings | Boxes and bars approved for the supplied U-bolt kit | A bolt and internal plate secure the box around the bar | Bolt length, plate position and tightening instructions are kit-specific |
| T-track adapters | Bars and boxes approved for the same adapter system | Attach through a compatible accessory channel | Channel dimensions, adapters and installation instructions must all match |
- Install every required mounting assembly in the locations shown in the box manual. Include the specified plates, washers and protective components. Do not substitute ordinary hardware for missing kit parts.
- Engage each fitting with its crossbar. Check that clamp jaws surround the bar correctly, U-bolts sit squarely, or approved track adapters engage as instructed. Keep straps and loose fabric out of the mounting surfaces.
- Tighten the fittings in the manufacturer’s stated sequence. Use the specified torque or the supplied mechanism’s stated tightening indication. Do not add extra force after a torque-limiting mechanism signals completion.
- Inspect each mount from inside and outside the box. Confirm full engagement and check that no fitting contacts the car roof. Fit any supplied slot covers or seals according to the manual.
- Check the attachment using the method in the box instructions. Gently test for movement at the mounting points without using the lid as a handle. Investigate sliding, lifting or loose hardware before loading.
Expected result: every required mount is fully engaged and correctly tightened, with no loose components or roof contact. The empty box stays secured at its mounting points.
Loading and departure checks
- Establish the remaining luggage allowance. The vehicle’s roof-load calculation must include the bars, fitting kit, empty box and contents. Also respect the bar-system limit, box luggage limit and the vehicle’s overall loading restrictions. Stay within every applicable limit.
- Weigh the luggage rather than judging it by appearance. Keep heavy equipment low in the vehicle and secure it there. Use the roof box for suitable lighter, bulky items, following its loading instructions.
- Distribute the load as the box manual specifies. Keep luggage clear of hinges, locks and mounting mechanisms. Do not pile items against the lid to make them fit.
- Secure the contents with the box’s approved internal straps and attachment points. The lid contains the load; it does not replace luggage restraint. Close and lock the lid using the manufacturer’s procedure, checking every closure point.
- Measure the vehicle’s actual fitted height and record it where the driver can check it before approaching a barrier. Confirm the applicable driving restrictions in the vehicle, bar and box instructions. Follow the lowest permitted maximum and reduce speed further for conditions.
- Complete the manufacturer’s prescribed initial journey check and later inspection schedule. Recheck the installation before departure and after any event that raises concern about movement or damage. Pull over somewhere safe if you hear a new rattle or feel a change in handling.
Expected result: the load is weighed, restrained and within all limits. The box is locked, the fitted height is recorded, and the driver knows the applicable restrictions.
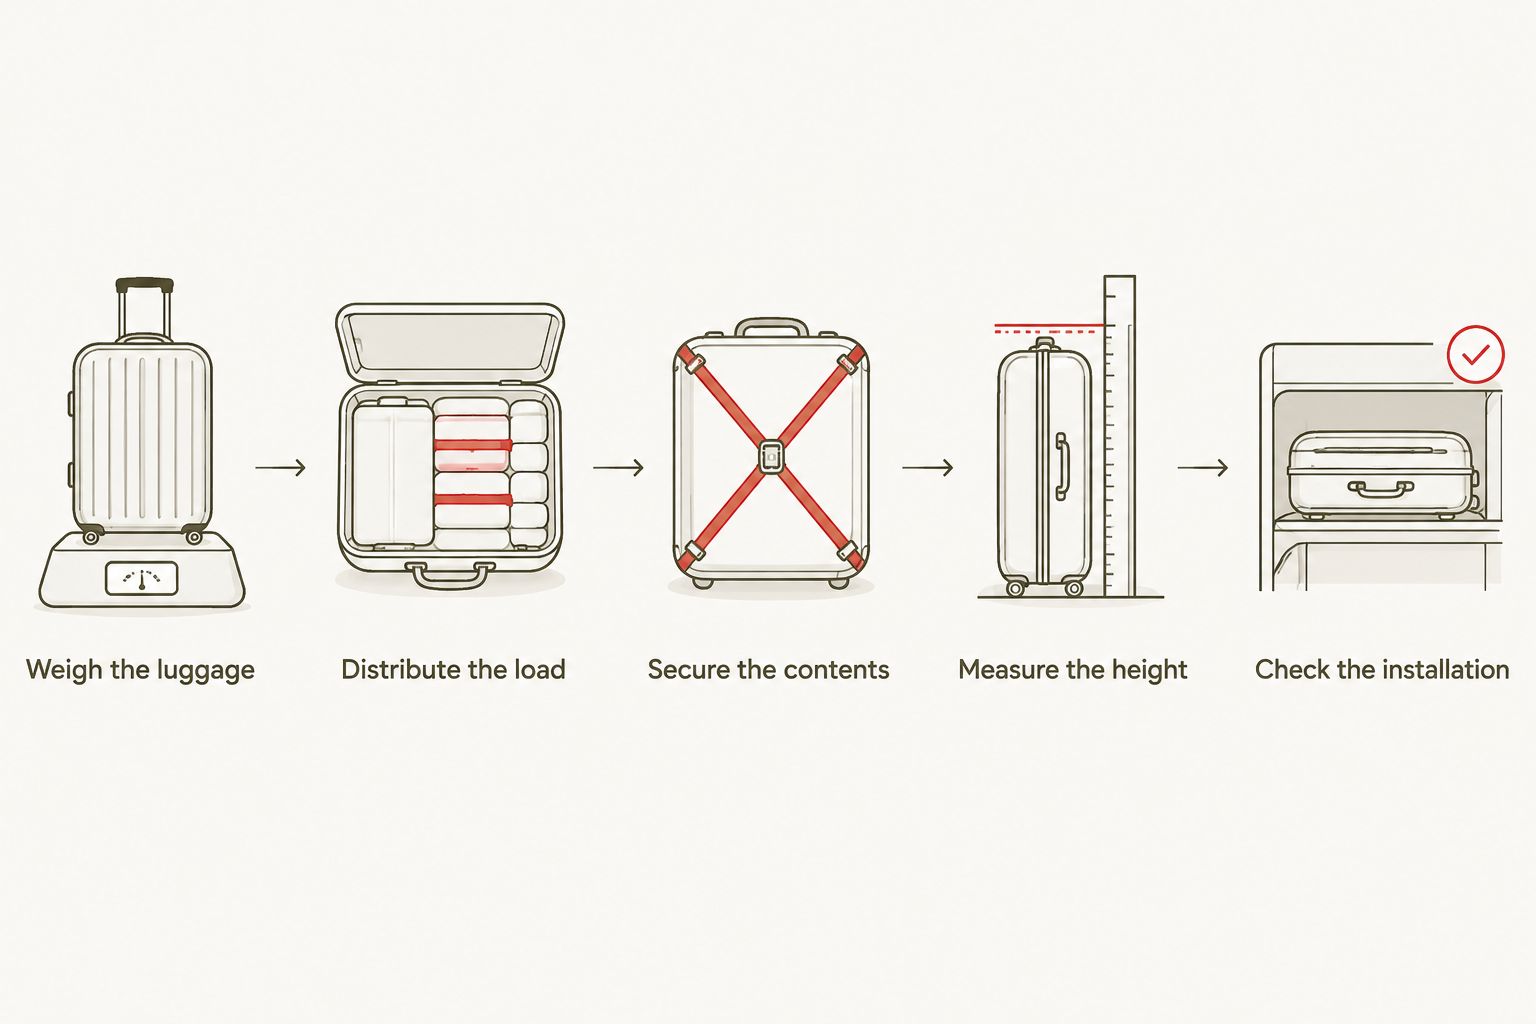
Make this the departure routine for every 2026 trip, not just the first fitting. A different passenger load or a heavier camping bag changes what the vehicle can carry.
Refit the roof box after storage
Refitting to the same car is a shorter workflow only when the vehicle, bars and mounting hardware remain unchanged. Previous use does not confirm that stored parts are still sound.
- Inspect the shell, hinges, locks, straps and mounting hardware. Look for cracks, corrosion, damaged threads and missing components. Keep the box off the car until damaged safety-critical parts are resolved.
- Confirm the crossbars are still correctly positioned and secured. Match the installation to the current vehicle, bar and box instructions rather than relying on old marks alone.
- Repeat the positioning, mounting and departure checks above. Recheck tailgate clearance and fitted height even if the box appears to sit in its previous position.
If you change cars during 2026, restart with compatibility. A roof box can transfer between vehicles only when the new vehicle, bars and fittings support that installation.
Troubleshooting
The clamps will not close around the bars
Check the bar’s width, height and profile against the mounting kit’s approved range. Confirm that you have assembled the clamp correctly. Use an approved alternative kit if specified; do not file the clamp, bend a bolt or remove required parts.
The tailgate touches the box
Reposition the box within its permitted adjustment range and test the tailgate again. Move the crossbars only where the vehicle and bar instructions permit. If clearance remains inadequate, the current combination does not fit.
The box moves after tightening
Stop loading and inspect every mount. Check for incorrect engagement, missing plates, trapped material or an incompatible bar profile. Do not compensate by overtightening; resolve the cause and repeat the attachment check.
The lid will not lock
Remove pressure from luggage and keep straps clear of the lid edge. Check that each closure point is aligned and the box sits correctly on its mounts. Never force the key or drive with an unsecured lid.
There is a new whistle or rattle
Stop safely and check the box, mounts, bar covers and any required channel strips. Some aerodynamic noise can occur with roof equipment, but a new rattle needs inspection. Do not assume the sound is harmless before checking the attachment.
Customise your workflow
We recommend separating roof-box luggage from heavy boot luggage before packing for Ireland’s campsites. Label bags by destination or use so you can unload what you need without disturbing the whole load. Keep roadside essentials accessible inside the vehicle.
Use suitable inner protection for gear that needs to stay dry; follow the box’s stated water-protection guidance rather than assuming the shell is waterproof. Our dry bags for outdoor trips in Ireland guide covers a useful next step.
If you want another roof accessory alongside the box, reassess usable bar space, approved mounting positions and total load. Space on the bar is not proof that the combined installation is permitted.
FAQ
Can I fit a roof box to any roof bars?
No. The box mounts must be approved for the bars’ dimensions, shape and spacing, and the bars must be approved for your vehicle. Check all the relevant instructions before fitting.
Can I attach a roof box directly to roof rails?
Do not attach a conventional crossbar-mounted roof box directly to longitudinal roof rails. Fit the approved crossbars and use the box’s specified mounting hardware.
How tight should roof-box clamps be?
Tighten roof-box clamps to the setting or completion indication specified by the manufacturer. There is no universal torque setting for every roof box, and extra force can damage components.
Does the empty roof box count towards the roof-load limit?
Yes. Include the empty box, roof bars, fitting kit and luggage when checking the vehicle’s roof-load limit. Respect the separate limits for the bar system and box as well.
Can I fit a roof box on my own?
Fit a roof box alone only if you can lift and position it safely and the instructions allow it. Get help when the box’s size, weight or vehicle height makes controlled lifting difficult.
How fast can I drive with a roof box in Ireland?
Follow the lowest applicable maximum in the vehicle, roof-bar and roof-box instructions, while obeying Irish road speed limits. Reduce speed further when wind, road conditions or vehicle handling require it.
Can I use external straps instead of roof-box clamps?
No. External luggage straps are not a replacement for the box’s approved mounting hardware. Secure the box with its specified fittings and restrain luggage inside using the approved internal system.
One last thing
The roof box can be empty and still make your car too tall for an entrance. For your 2026 travel checklist, put the measured fitted height beside the keys or somewhere the driver can check before moving. Never test a barrier’s clearance by driving underneath it.