

Marine battery to electric outboard motor: complete 2026 power setup
Instead of reconnecting loose battery leads before every trip, connect your marine battery to your electric outboard motor through correctly rated cables, circuit protection and an isolator. This 2026 guide covers matching the battery, securing the wiring and checking the motor before you launch in Ireland.
- To connect marine battery to electric outboard motor safely, match voltage and follow the motor manufacturer's wiring instructions.
- Minn Kota Endura C2 is a 12V option; its listed maximum current draw is 30A.
- Watersnake Geo-Spot uses a single 12V bank, with listed current draw up to approximately 50A.
- Battery capacity does not replace adequate discharge current, correctly sized cable or circuit protection.
Why this matters
A battery that fits in your boat is not automatically suitable for your motor. Voltage, discharge capability, cable size and protection must all match. A poor connection creates resistance and heat; an unprotected short circuit creates a fire risk.
Start with our guide to marine batteries for electric outboards and fishfinders if you have not chosen the battery. We recommend choosing the motor and battery as one electrical system, not treating the battery as an interchangeable accessory.
For your 2026 setup, write down the exact motor model and battery model. Keep their instructions with the boat's equipment. Generic wiring advice does not replace either manufacturer's requirements.
Before you start
- Get the specifications. Have the motor manual, battery instructions and charger instructions. Confirm nominal voltage, permitted battery chemistry, maximum motor current, battery discharge limits and the specified circuit protection.
- Gather the installation materials. You need a secured battery enclosure or tray, suitable marine cable, correctly sized terminals, terminal covers, rated circuit protection, an appropriate isolator and a multimeter. Have a competent marine electrician make connections you cannot terminate or verify correctly.
- Check the hidden compatibility issue. A lithium battery's battery management system, or BMS, must support the motor's load. Matching voltage and amp-hours alone is not enough; also check the battery's permitted operating and charging temperatures.
Remove jewellery before working around battery terminals. Keep metal tools from bridging the terminals, disconnect charging sources and leave the motor electrically isolated throughout installation. Never work on a swollen, leaking, unusually hot or damaged battery.
Battery and motor specifications
- Read the motor's identification plate and manual. Record its required supply voltage and maximum current draw; do not infer either from thrust alone.
- Check that the battery chemistry and full-charge voltage are permitted by the motor manufacturer. A nominal voltage label is not the complete compatibility check.
- Confirm that the battery can supply the motor's required continuous current and any specified starting demand. For lithium, check the BMS limits as well as the cells' capacity.
- Record the manufacturer's cable and fuse or breaker requirements. Use the specified cable-length convention when reading its sizing table.
Expected result: you have a documented match between the motor, battery, cable and protection device before connecting anything.
Two supplied motor examples
These specifications illustrate why motor current matters. They do not establish compatibility with any particular battery. Check the exact model manual before installation.
| Motor | Best for | Listed electrical requirements | Useful feature | Limitation to plan around |
|---|---|---|---|---|
| Minn Kota Endura C2 30lb Thrust | Anglers wanting telescopic-handle control | 12V; 30A maximum draw | Direct handle control and a battery meter | The battery meter does not replace checking battery condition and remaining capacity |
| Watersnake Geo-Spot GPS Electric Bow Mount Trolling Motor | Anglers wanting GPS position-holding functions | Single 12V bank; up to approximately 50A draw | Anchor hold and ground-speed cruise | Requires a suitable bow installation and a supply sized for its higher listed current |
The Endura C2 example lists 30A maximum draw; the Geo-Spot description lists up to approximately 50A. Do not copy cable or protection choices between them simply because both use 12V supplies.
We recommend checking the installation requirements before choosing extra functions. GPS controls do not remove the need for a secure mount, suitable wiring and enough battery reserve to return safely.


Battery mounting and cable route
- Secure the battery in a suitable tray or enclosure using restraints intended for the installation. Follow the battery maker's mounting orientation and ventilation instructions.
- Position the battery with the boat's loading and balance in mind. Keep it protected from bilge water and direct spray, without blocking any ventilation the battery requires.
- Plan the positive and negative cable routes. Keep them clear of sharp edges, moving mounts, steering parts and places where boots or tackle can damage them.
- Measure the route before selecting cable. Account for the complete circuit as required by the motor manufacturer's sizing guidance, including any extension leads and connectors.
- Support the cables, protect penetrations against chafing and leave enough movement for steering or deployment. Do not leave loose loops where they can catch.
Expected result: the battery cannot shift during normal boat movement, and the cables reach the motor without tension, crushing or abrasion.
For Irish lake and coastal use, protect the connections from spray rather than assuming a battery box makes everything waterproof. Water can enter around cable openings. Terminal covers still matter inside an enclosure.
Keep the isolator accessible. You must be able to disconnect power without reaching through loose tackle or leaning towards a moving propeller.
Circuit protection and connections
- Keep the battery disconnected and the isolator open. Set the motor control to its stopped position and follow the manufacturer's procedure to prevent accidental starting.
- Install the specified fuse or breaker in the positive supply, close to the battery as the installation instructions require. Its voltage rating, current rating and interrupting capacity must suit the system.
- Fit the isolator and connectors according to the approved wiring layout. Every current-carrying component must have a suitable DC rating; a rubber cover alone does not establish electrical suitability.
- Terminate the cables using the specified lugs and crimping method. Tighten connections to the relevant manufacturer's torque specification, support the cable and cover exposed positive terminals.
- With all power sources isolated, verify polarity using the terminal markings and a correctly configured multimeter. Follow the manufacturer's connection sequence; on a conventional isolated battery circuit, connect positive first and negative last.
- Refit covers and check that tools, loose fixings and cable offcuts are clear. Leave the isolator open until you are ready for the controlled test.
Expected result: the motor has a protected positive supply, a dedicated negative return and verified polarity, with no exposed positive connection that loose metal can bridge.
The functional layout below is a planning aid, not a substitute for the motor's wiring diagram. The positive path includes Battery, Circuit protection, Isolator and Motor; the negative return also needs correctly sized cable.
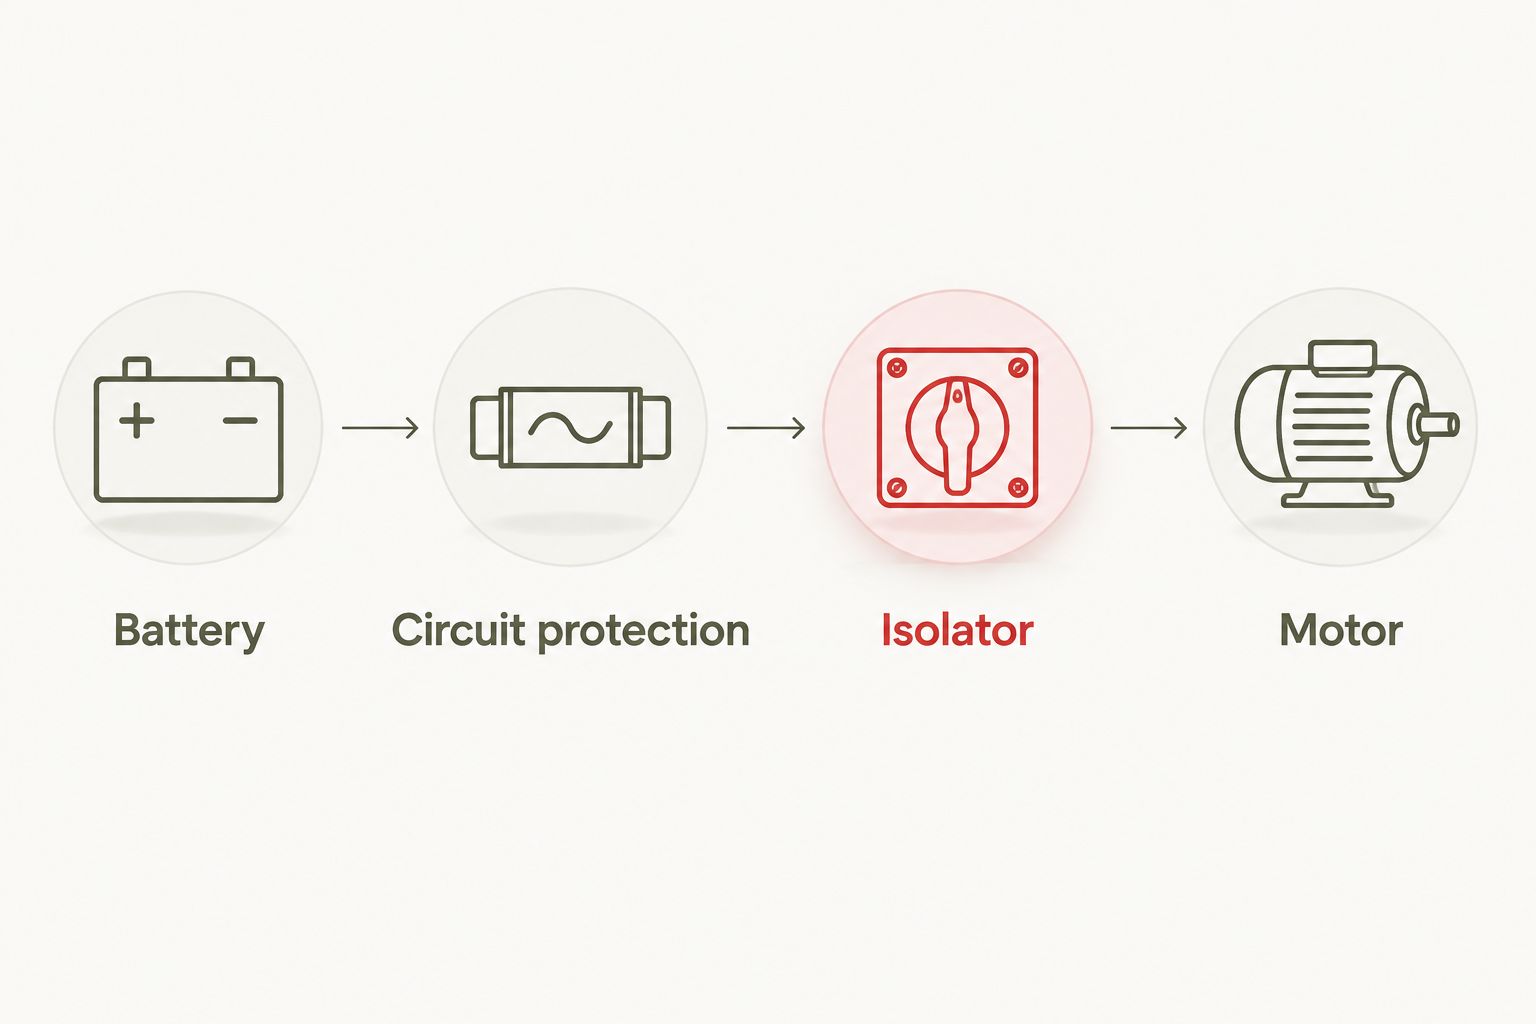
Never use the boat hull as the motor's negative return. Do not substitute light accessory wiring, a cigarette-lighter socket or temporary clips for the connection specified by the motor manufacturer.
A lithium battery's BMS is not a replacement for correctly selected circuit protection. Also avoid choosing a larger breaker simply to stop repeated trips; diagnose the fault first.
Controlled motor test
- Inspect the propeller area with power isolated. Remove obstructions according to the motor manual, then keep hands, clothing and fishing line clear.
- Secure the boat in a suitable test location. Follow the motor's required immersion depth and deployment instructions; do not assume it can run dry on the trailer.
- Check that everyone is clear of the propeller. Close the isolator and power up using the exact motor instructions.
- Select the lowest appropriate setting and verify controlled operation. Test steering and stopping before increasing demand gradually within safe conditions.
- Stop and isolate the motor before inspecting the installation. Investigate unusual heat, odour, noise, intermittent operation or any movement at the battery mount.
Expected result: the motor starts, steers and stops predictably, without protection trips, warning indications or abnormal heating.
Make your first 2026 outing a short proving trip close to a safe landing point. Wear a suitable personal flotation device and carry an independent means of returning appropriate to the boat and waterway. Do not discover the system's limits far from shore.
Variant: a higher-voltage battery bank
Some electric motors require 24V rather than 12V. Only build a higher-voltage bank when the motor instructions require it and the battery manufacturer permits the arrangement. Never increase voltage to chase extra thrust.
With compatible 12V batteries, a series connection can form a nominal 24V bank. A parallel connection retains nominal voltage instead. Confusing the arrangements can damage equipment.
Follow this additional workflow:
- Confirm the required bank voltage and approved battery arrangement in writing.
- Use batteries matched as specified by their manufacturer. Do not mix chemistry or assume every lithium battery permits series connection.
- Have the interconnections, protection, isolator and charging arrangement checked for the complete bank voltage.
- Verify output voltage and polarity before the motor is connected.
The advantage is meeting a motor's higher-voltage requirement. The drawback is a more involved installation and charging arrangement. Do not tap one battery in a series bank to supply accessories unless the system design explicitly permits it.
Troubleshooting
The motor does not start
Check the isolator, battery state, connector seating and any model-specific deployment or enable requirement. Isolate power before inspecting a fuse or wiring connection. If polarity is wrong or voltage is outside the motor's permitted range, stop rather than repeatedly trying the controls.
The motor cuts out under load
Check for a discharged battery, excessive voltage drop, a BMS shutdown or a protection-device trip. Inspect the propeller for fouling only after isolation. Use the motor and battery fault instructions to identify the cause; repeated resetting is not a repair.
A connector becomes hot
Stop and isolate the system. Loose terminals, corrosion, damaged contacts and undersized wiring create resistance and heating. Replace damaged components and correct the termination or sizing before another test; tape does not repair a burnt connector.
The breaker keeps tripping
Check for propeller obstruction, damaged cable, a short circuit or protection that does not match the approved installation. Do not increase the rating without checking the motor specification and cable capacity. A breaker protects the circuit, not just the motor.
The battery will not accept charge
Check charger compatibility, connections and battery fault indications. For lithium, check temperature limits and any low-voltage recovery procedure. Do not bypass the BMS or apply a lead-acid recovery mode unless the battery maker explicitly permits it.
Customise your workflow
Once the motor circuit works correctly, plan charging and accessories separately. A charger must match the battery chemistry, bank voltage and permitted charge current. Disconnect it before launch according to its instructions.
A fishfinder adds another electrical load. Give accessories their specified protection and supply arrangement; never connect a lower-voltage accessory directly across a higher-voltage bank. Investigate electrical interference through the equipment manuals rather than moving wires at random.
We recommend keeping a simple 2026 installation record: component models, cable specification, protection rating, terminal torque requirements and the wiring diagram. Update it whenever you replace a battery, extend a cable or change the motor.
FAQ
How do I connect a marine battery to an electric outboard motor?
Match the motor's required voltage and battery compatibility, then connect it through the specified cable, circuit protection and isolation arrangement. Verify polarity before energising and follow the exact motor manual for connection and testing.
Can I use a car starter battery for an electric outboard?
Choose a battery approved for the motor's sustained load rather than relying on a car starter battery. Starting performance does not establish suitable cycling performance, usable capacity or compatibility with the motor.
What size fuse or circuit breaker do I need?
Use the protection specified for the exact motor and wiring installation. Do not choose a rating from thrust alone or increase it to prevent nuisance trips without diagnosing the cause.
Is a lithium marine battery suitable for an electric motor?
A lithium marine battery is suitable only when its chemistry, voltage range, discharge capability and BMS limits meet the motor's requirements. Check charging compatibility and temperature restrictions as well.
Should I connect the positive or negative terminal first?
Follow the equipment manufacturer's sequence; a conventional isolated battery circuit normally connects positive first and negative last. Disconnect negative first when removing that battery, with the motor, charger and other power sources isolated.
How long will my electric outboard run from a battery?
Runtime depends on usable battery capacity and the motor's actual current draw throughout the trip. Wind, current, boat loading and speed setting affect demand, so an amp-hour label alone does not establish safe trip duration.
Do I need a different connection method for a 2026 electric motor?
Use the instructions for the exact motor model, not a wiring method based on the calendar year. Supply voltage, connector requirements, circuit protection and battery compatibility determine the installation.
One last thing
A bigger amp-hour figure does not guarantee that a battery can deliver the motor's required current. Capacity and discharge capability answer different questions. Before your next 2026 launch, check both, then confirm that every connector between the battery and motor suits the same circuit.